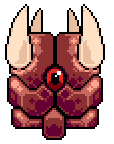
Nowhere
| Floor # | 7 (8 internally) |
|---|---|
| Music | 'Dark Abyss' |
| # of Mini-Bosses | 3 |
| Mini-Bosses | Pollyp, Chomper, Quadcore, Heavy Crawler, Sentron, Archivator, War Orb, Grimoire, Intruder, Shade, Funnel, Interceptor, Overseer, Idol, Redcap, Grimm, Twofold, Engorged |
| Bosses | Database |
Nowhere is a secret 7th floor, accessed by completing Floor 6 while possessing the Err: Integer Overflow cartridge. The cartridge will appear in runs after the player has completed Floor 6 once (on either difficulty), and is hidden behind a bombable wall. The room is unmarked, like a Secret Room, and more well-hidden. However, obtaining a map makes finding it trivial.
The floor itself appears as a glitched space, with tilesets borrowed from the other floors appearing in its rooms, with room layouts that sometimes appear unconventional (featuring tiles and traps in abnormal locations). Because of this, the theming of the floor on a room-to-room basis is chaotic, with enemies of all types as well as new enemies that are amalgamations of two already-existing enemies.
When entering a room, it will be themed as a room from one of the six previous floors, and after defeating the enemies within, the walls will begin to blink between different tiles, many that do not appear intended to be wall tile, and the background will turn black.
Unlike the previous floor, shops can appear here, providing the player with some relief. Aside from the tiling on the walls of the room appearing glitched, the shop itself is normal.
Also unique to this floor is the versatility of possible mini-bosses that the player can encounter. While normally there is a selection of four mini-bosses that can appear on any given floor, Nowhere features all mini-bosses from previous floors as possible encounters (excluding those from Temple).
Enemies
These are all the new enemies that can appear in Nowhere, not including enemies from previous floors.
| Name | HP | Debris | Bestiary Entry | Behavior and Notes |
|---|---|---|---|---|
| Will teleport to a location within line of sight of the player, then open and fire thick bursts of fire bullets in all directions. Is only vulnerable when open. When reaching 0 health, instead of dying, will finish its attack and then teleport to the player location and self-destruct, creating a storm of fire bullets that slow down as they travel. | ||||
| Fires at the player in a burst of projectiles around itself that resembls a diamond with large bullets at its tips.
| ||||
 |
Bounces around the room, firing bullets when it connects with a wall or another bouncy enemy. When a Martyrball is killed, all Martyrballs in the room accelerate rapidly.
| |||
 |
Teleports to a random spot and summons several copies of itself, each firing an electric beam at the player, as well as summoning a circle of 5 bullets before vanishing. The real Vardimancer can be identified by looking for the copy that hasn't shot at the player. Fakes have an HP bar and cannot be distinguished from the real Vardimancer using Scanner. Fakes will still execute their attack even if the real Vardimancer is dead, and are considered real enemies for room completion. Damaging a fake will cause it to spawn its circle of bullets and disappear.
| |||
 |
Has two attacks: one fires a burst of four projectiles in a line around the Prismancer; if the player is within direct line of sight they will get slowed as if hit by a cold bullet. The second attack fires an ice chunk at the player that can bounce off walls twice, splitting into more bullets as it collides with them. Instead of being killed when hit by an Icicle, the Icicle breaks when it hits the Prismancer, and releases bullets downwards (this applies to all Ice Mages).
| |||
 |
Has two attacks: the first fires a large projectile at the player along with smaller secondary ones, with the large projectile then exploding into more bullets upon impact with the wall. The second attack places three exploding sigils around the room at random, releasing multiple bullets after the explosion outwards in a wide spread pattern.
| |||
| Archaeomancers create indestructible blocks around the room that fire at the player. When an Archaeomancer dies, all blocks summoned by the specific Archaeomancer will be destroyed. Archaeomancers cannot be affected by moving blocks, and will simply pass through them (this applies to all Earth Mages).
| ||||
| Projects an aura that grants each enemy within it a red Halo, each enemy then creating their own auras. Will always spawn a single revenge bullet upon death. |
Mini-Bosses
| Pollyp | Chomper | Quadcore | Heavy Crawler | Sentron | Archivator | War Orb | Grimoire | Intruder | Shade | Funnel | Interceptor | Overseer | Idol | Redcap | Grimm | Twofold | Engorged |
Boss
 |
Notes/Trivia
- Internally, the game considers the Conduit Floor to be Floor 7, and Nowhere to be Floor 8, causing mechanics that scale with floor number to scale unusually high in Nowhere.
- An integer overflow, in programming, occurs when an operation forces a number to exceed its range constraints. For example, if a number is allowed to be within the range 0-10, then adding 1 to the number 10 will cause an overflow. The nature of how a program handles this can vary, but in some cases it can result in the program being in a glitched state, as Nowhere reflects.
- The glitched nature of the level is not only a reference to the concept of integer overflows, but more specifically to glitched levels in games overall.
| Star of Providence | ||||
|---|---|---|---|---|


